edge
edge
 firefox
 chrome
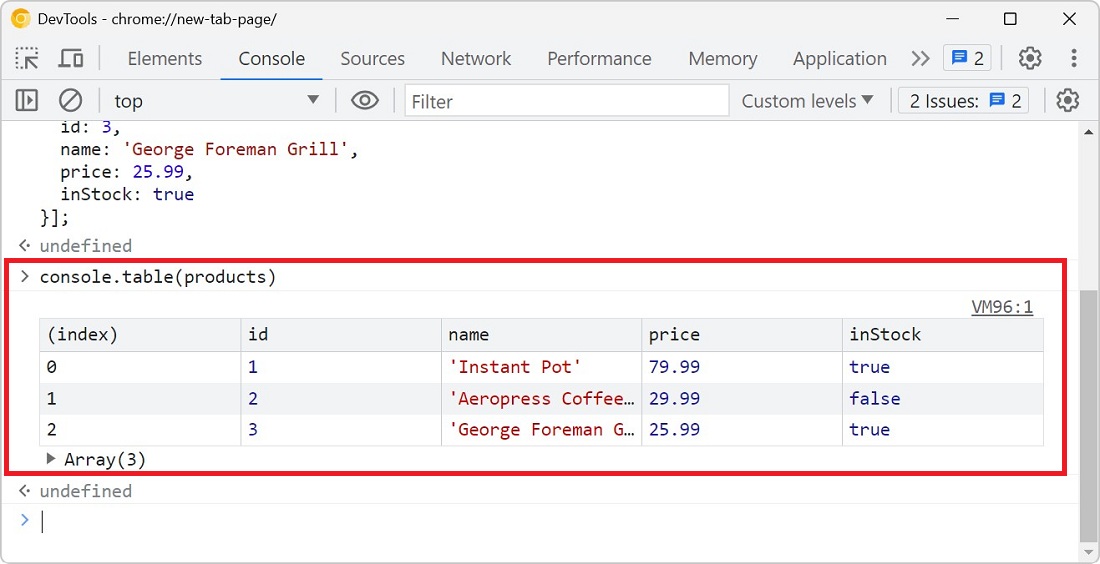
Objects appear in many places in DevTools. Most commonly in the Console tool, but also in various parts of the Sources (or Debugger) tool when you debug JavaScript code.
DevTools is the one that decides how these objects appear in the UI. For example, string and numbers have different colors, arrays have a little preview of the items, and an icon that lets you expand them to see the full list of items, etc.
But DevTools also lets you customize the way objects are displayed by using Custom Object Formatters. This can be very useful when you're working with a framework that stores objects in a particular way, and you want to make it easier to inspect these objects, or just to make certain types of objects stand out more.
Custom Object Formatters isn't something you configure in DevTools. Instead, you define them in the code that runs on the webpage, and DevTools picks them up automatically.
To create a new formatter:
-
Create a new object with three properties:
header,hasBody, andbody. All three properties should be functions that receive anobjectparameter, the object that DevTools wants to display. Theheaderfunction should return the preview of the object, in JsonML format.hasBodyshould return a boolean that tells DevTools whether the object can be expanded to display more information. Andbodyshould return the preview of the object when it's expanded, also in JsonML format. For example:const myCoolFormatter = {
header: function(object) {
if (!(object instanceof ColorCombo)) {
return null;
}
return ["div", {style: `background-color: ${object.color1}; color: ${object.color2}; font-weight: bold; padding: .25rem;`}, "ColorCombo"]
},
hasBody: function(object) {
return object instanceof ColorCombo;
},
body: function(object) {
if (!(object instanceof ColorCombo)) {
return null;
}
return ["ol",
["li",
`Color 1 (${object.color1}): `,
["span", {style: `display: inline-block; width: 1rem; height: 1rem; border-radius: 50%; background-color: ${object.color1}`}]
],
["li",
`Color 2 (${object.color2}): `,
["span", {style: `display: inline-block; width: 1rem; height: 1rem; border-radius: 50%; background-color: ${object.color2}`}]
]
]
}
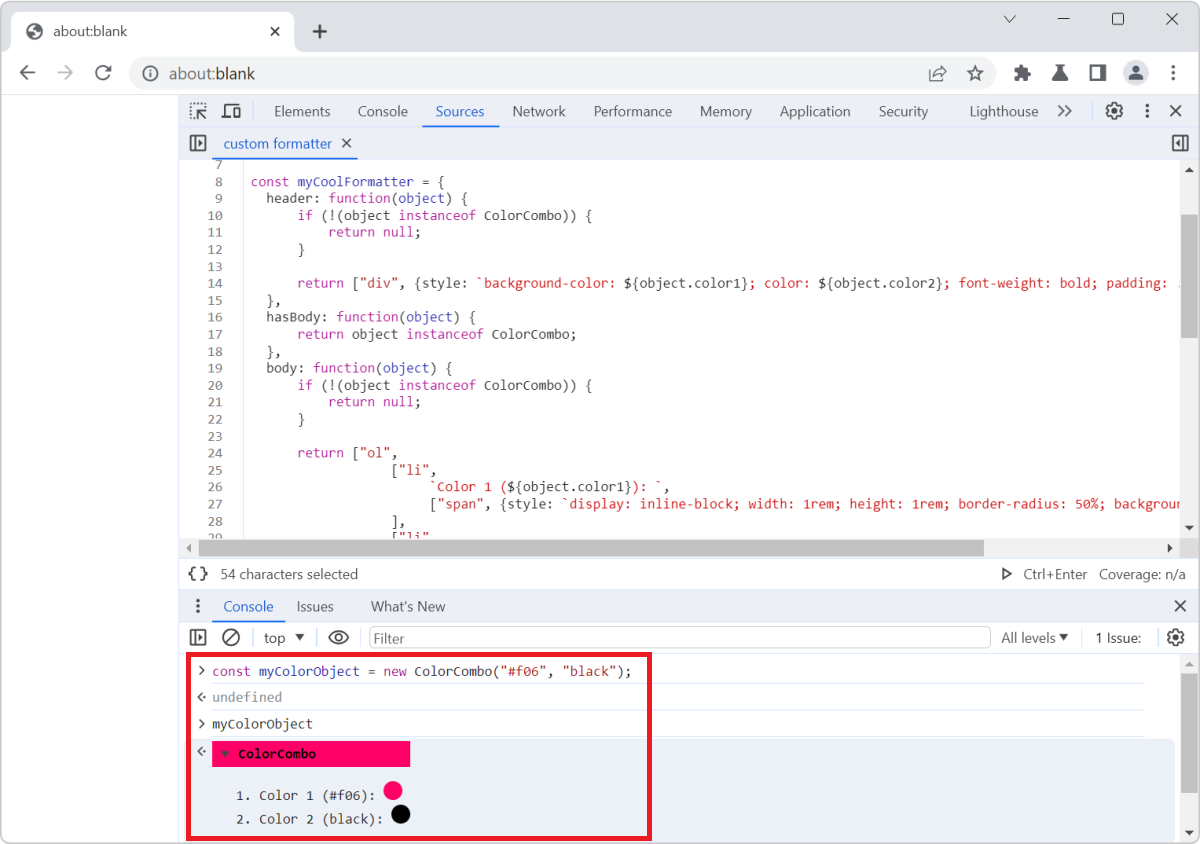
}The above code snippet defines a custom formatter that will be used for objects that are instances of the
ColorComboclass. Let's imagine this class is used on your webpage and is defined as follows:class ColorCombo {
constructor(color1, color2) {
this.color1 = color1;
this.color2 = color2;
}
} -
Append your formatter object to the global
window.devtoolsFormattersarray:// You can create a new array.
window.devtoolsFormatters = [myCoolFormatter];
// Or append to the list of existing formatters.
window.devtoolsFormatters.push(myCoolFormatter);
That's it, you don't need to do anything more. Now, whenever ColorCombo objects are displayed in DevTools (for example when using console.log(object)), they will be displayed using the custom formatter you defined.
Learn more:
- Firefox DevTools Custom Object Formatters.
- Custom Object Formatters in Chrome DevTools.
- Vector-devtools, a cool formatter for 2D vector objects.